Setting Section Heading Levels |
  
|
Setting Section Heading Levels |
|
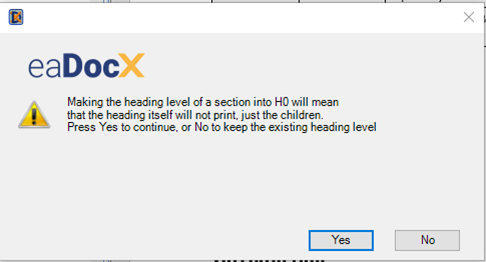
Once you have confirmed the Section Contents to be printed in your document, you can amend the heading levels of each Section by right clicking on the Green brackets for the relevant Section in the Preview Pane. You then have the option of Increasing or decreasing the Heading level. (Note that increasing the heading level changes it from H1 to H2 to H3 etc, while decreasing the level changes it from H2 to H1 to H0.) If you do try to change the heading level to H0 a warning dialogue will appear as follows:
Note that the Headings printed will be those specified by your EA package structure, with the complete definition of text as defined by your “In-Line formatting” (as per the screenshot below).

In this way all the document Sections can be levelled to suit your structure and the Table of Contents and heading styles etc will be automatically adjusted as the document regenerates.
eaDocX Sections which document EA packages take their structure straight from the EA model, allocating Heading levels to match the tree structure within your EA package. In these cases the structure of your document (Heading levels) will reproduce the structure of your model package (and sub packages).
Sections that that include element reports, matrix reports, or document/project information, should have Headings manually inserted in the text just before the pink bookmarks for those sections. The heading levels can then be set (by choosing the Text Style in Word) as appropriate to suit the rest of your document structure, and will appear in the Table of Contents in the same way as any other manually inserted content.
See Structuring Your Document for a fuller discussion.